How to choose the right images for your website

Having strong brand imagery for your website and social media is a GAME CHANGER.
In fact, one of the first questions we tend to ask any new client we take on is if they have strong imagery to support their brand.
In this post, we’re diving into everything you need to know about website imagery, from tips on how to choose the right images for your website to how you can maximize usage of these images to ultimately make a statement online and attract more of your ideal clients or customers.
gather inspiration
Before you start planning a photoshoot or sourcing images online for your website, we always suggest setting up a private Pinterest board and pinning ANY images that inspire you and have the overall vibe you are going for. It doesn’t necessarily need to be only images that relate to your product or service, you can pin different ideas on how to stage your shoot, how to pose, instagram shots you love, home decor that inspires you, colours that inspire you, you name it!
A Pinterest board is like a mood board, and really helps to set the overall theme and vibe as a foundation for planning a photoshoot or serving as a guideline for your image sourcing online.
plan for
on-brand imagery
Whether you are prepping for your photoshoot or sourcing images online, you want to always ensure your images are on-brand.
So, what exactly does this mean?
To give you an example, if you are working with a photographer who tends to take only light and airy photos, then you don’t want to show up to your photoshoot wearing dark, bold attire.
If sourcing photos online, ask yourself if these images represent your brand personality, values and colour palette before saving any of those images, then filter through the collection once again.
Your images are a representation of your brand, so you want to ensure your colour palette, brand personality and values stand out in order for your brand to come together collectively.
plan in advance for
image composition
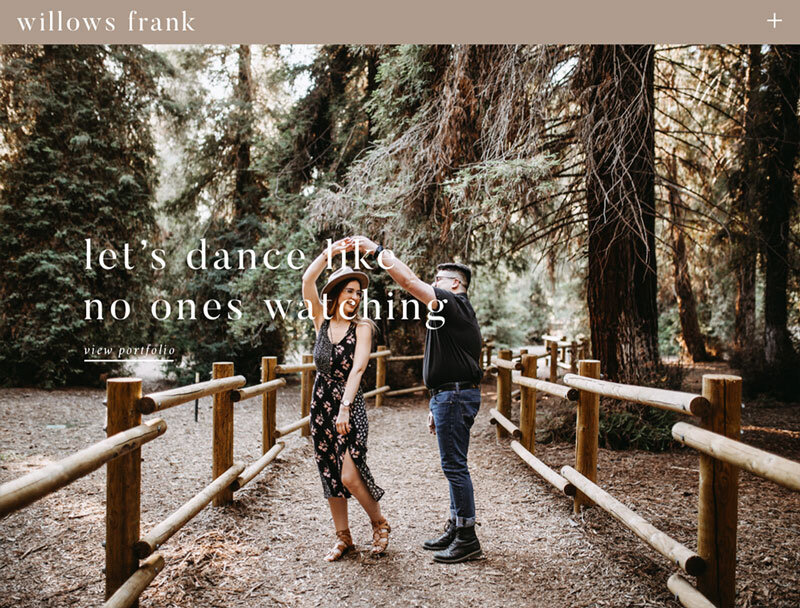
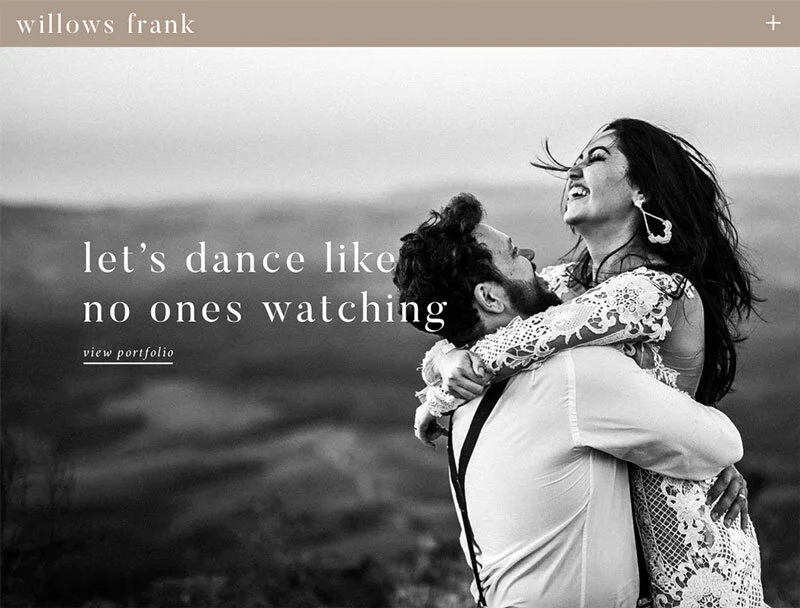
A common situation we run into with clients that want strong headlines to overlay on top of banner images on their website, is that their banner images are far too busy for text to be placed on top.
When sourcing your imagery, or planning for a photoshoot, it’s important to consider the composition of your photos.
If you want to place text over images, you need to ensure there is plenty of blank space and breathing room in a photo for the text to appear legible when placed on top. (Otherwise people may get a little dizzy😆)
build your image directory
To come across professionally and consistent online, we highly suggest hiring a photographer.
In fact, alongside a website, photography is one of the best investments you can make for your online business!
This can be a game changer for your online presence because it ensures all your images are high quality, consistent and YOUR OWN!
Of course, we get that not everyone has the budget for a professional photoshoot, but thats not the only option. There are great online stock imagery resources such as Pexels, Unsplash, Kaboom Pics, or even amazing paid stock resources (Kate Max Stock or Ivory Mix, to name a few) that have SO many incredible images available for you!
One thing to always keep in mind is consistency… if you do take the stock imagery route, be sure you are selecting images that have the same mood and tone so your website or social feed doesn’t look all over the map!
Pro-Tip: Need help planning out your social feed with these new images? We love Planoly as it allows you to organize your social grid to ensure everything’s looking A-OK all together!
use the images wisely
Once you have that solid directory of images that all have the same overall mood and tone, it’s time to have some fun with them and put them to use!
We suggest selecting 5-7 top photos that you’d like to use on each page of your website. Keeping in mind, you’ll likely want your top favourite images on the HOME page of your website, because you only have a few seconds to capture your clients attention and to keep them on your website.
On the ABOUT page of your website, we suggest using a photo of you, the business owner, where you are looking directly at the camera. This helps to build trust and credibility behind your business!
People LOVE to see the face behind the business and get to know you on a more personal level to further connect with you and your brand.
Lastly, there are many ways you can maximize the use of just one image! For example, below you will find an image of Meg working on her computer. By cropping out specific sections of the photo, you can have a whole new photo to use elsewhere on social media or on your website. If you don’t have a lot to work with, theres definitely ways you can maximize the use of just one photo too!


Overall, there are many factors to consider when choosing the right images for your website and planning for your content.
With a solid, well thought-out strategy and consideration of the tips above, we’re sure you will be well on your way to making a statement online and looking damn’ good!